Affinity for Board Games
I’ve used the free graphic design software Affinity V3 for board game prototyping since it came out (and V2 before that). This is what I’ve learned over that time. Examples are from Psykids, which I’m codesigning with Kekoa DeRego.
My main focus is efficiency of iteration for board games, which tend to use a lot of icons and require frequent rulebook updates.
Icons (and other images)
Board game icons need to change often during development, and when they do, you don’t want to have to manually replace them across all of your documents. Luckily, Affinity gives you a nice method to automatically keep your iconography up-to-date. My approach is:
Create one Artboard document for all of your icons.
Use Symbols inside your icon document.
Link to the icon document from all your other files.
Artboards
An artboard is a second canvas inside of the same document. This allows you to edit your icons side-by-side but import them separately to other documents.
When creating a new document (Affinity file), you can mark it to use artboards, but this is unnecessary, as you can add an artboard to any single-page document using the artboard tool. See adding & removing artboards.
Symbols
Symbols are elements that synchronize changes across all instances of the symbol, so when you edit one, they all get the edit. This is useful for reusing elements in several icons. For example, Psykids uses a “wild die” symbol in dozens of icons.

If I need to change the look of this wild die, I can edit any instance of it and Affinity will automatically copy that change to all other instances.
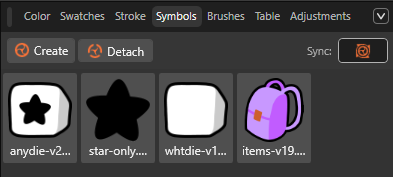
You can access the symbols panel in Windows > Vector > Symbols. Note that the panel lets you temporarily disable syncing so that you can edit a single instance of a symbol if you need to.
Symbols only work inside one document, however. If you want to synchronize changes across documents, you need to link them.
Placing & Linking
To place an artboard, use the place tool to “place” the whole document. When you place a document that contains artboards, Affinity gives you a dropdown in the top left corner to select which artboard to use.

Placed resources like artboards can be linked or embedded. You want to link them. Linking maintains a connection between the documents so that changes to your source documents propagate automatically. When creating a new document, make sure to switch the Image placement option to Prefer Linked. Placed images (and documents) will be linked by default.

If you forget, you can change this option in Document Setup later and change any embedded resources to linked using the resource manager.
The Resource Manager
You can find the resource manager panel under Document > Resource Manager…
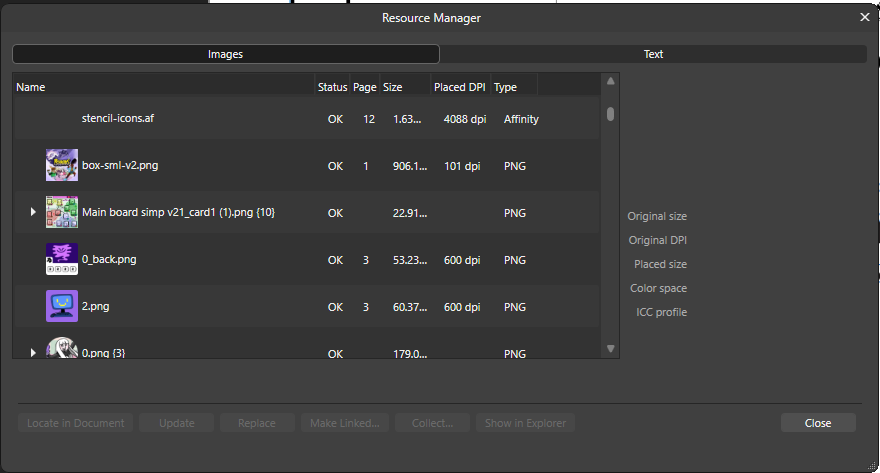
As its name implies, the resource manager lets you manage your imported resources, including placed documents. Here you can switch between linked and embedded, update images, and replace them.
A note on cloud-sync
If you share files with a co-designer or developer using a cloud service like Google Drive, make sure to only import resources that are either in the same directory (folder) or a subdirectory of your target document. Otherwise the linked resources will break.
Our shared folder for Psykids has roughly this structure:
Psykids/
  rulebook.af
  icons.af
  cards/
    card-1.png
    card-2.png
Icons in text
There are two ways to use icons with text: inline, and floating.
Inline icons
An inline icon sits in the text like an emoji. To do this, either use the place tool with your cursor in your text, or just copy and paste an image into your text.

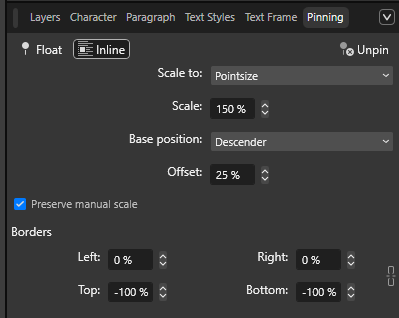
To position it correctly, use the pinning panel. It lets you set the height and vertical alignment of an icon, which will carry over into any new icons you add. My favorite settings are as follows:
- Scale To: Pointsize. The icon will scale with the text.
- Scale: 130%. Make it slightly bigger than the text.
- Base position: Descender. Position it lower on the line.
- Offset: 15%. Correct for the increased scale.
- Borders: -100% on the Top and Bottom. This prevents the icons from affecting the line-height.
I find that the best offset is half the excess scale, so (130% - 100%) / 2 = 15%. This is because icons scale up from below, so putting half the added scale in the offset balances that increased size above and below the line of text.
Floating icons
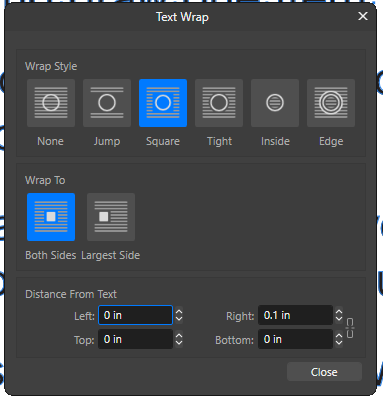
A floating icon exists outside of the text but moves relative to an anchor in the text. This is useful when an icon needs to span multiple lines. To do this, start by placing the icon on top of (but not in) some text. Then, with the icon selected, open up the Text > Text Wrap settings to make the text wrap around the image.
With the icon selected, click the “Float” button at the top left of the pinning panel. The icon will now reposition itself to stay near its adjacent text. Move the positioning cursor around to anchor the image to the intended text.

Slice Studio
To export artboards or any other portion of your document en masse, use the Slice studio, which you will need to enable. Studios provide different modes for Affinity, and the Slice studio is where you would name and configure multiple export files for one document.
Text & References
Like icons, there’s a lot of text that you don’t want to have to manually update, like your table of contents or cross references. To handle these automatically, you need to properly handle text styles.
In general, you never want to style text directly. Instead, all text should be assigned a type from the Text Styles panel. You can then update the style of a type of text en masse through the panel, rather than updating every instance of text. Text styles are also used to identify headers for automated tables of content cross references.
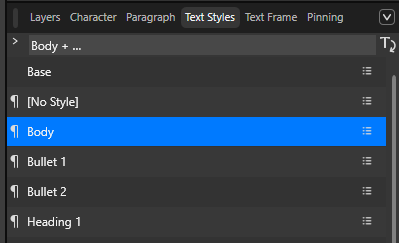
Table of Contents
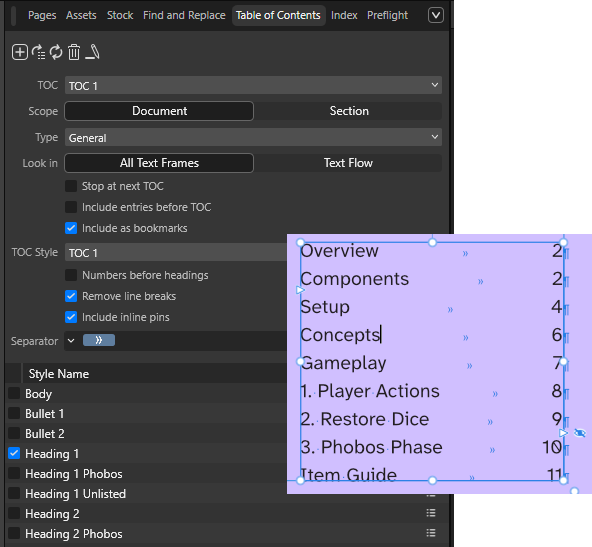
The biggest reason to use text styles is to target the headers when creating an automated table of contents (Text > Table of Contents). Once set up, you can select which types of headers to include in the list using the Table of Contents panel (Window > References > Table of Contents).
Cross References
A cross reference is when a rulebook says something like “See page 5”, which you never want to type out manually. Instead, use an automated cross reference, found under Text > Cross Reference. When assigning the target text for a cross reference, you can search by style of text, like for all Headers.
Master Pages & Fields
Speaking of page numbers, you also don’t want to have to manually type out the numbers on the bottom of the pages. Instead, create a couple of master pages and add them to every page other than the cover and the back. Then, any element you add to the master pages will appear on all these other pages.
To add a dynamic element like a page number, you need to add a field to the master pages (Text > Insert > Fields). I also like using fields on the cover to add a “Saved Date” so that it’s easier to keep track of the versioning on my rulebooks.
Units & Expressions
Set your document’s “units” to millimeters or inches so that coordinates and dimensions are given in the selected unit. Note, however, that you can edit values using any unit at any time by adding the proper suffix. For example, I can give a line a 3mm width in a document using inches and Affinity will convert it for me.
You can also type simple math expressions into fields and even mix and match unit types. I find this useful when dealing with margins on cards. If I need an object to span the length of a 2.5 inch poker-sized card minus 6mm for the margin on either side, I can type 2.5inch - 6mm and it will work.
Data Merge
You can use data merge to turn spreadsheets into sets of cards or tokens using a template, but I prefer using NanDeck or Dextrous for prototyping. There are two ways to use data-merge: to output one page for each component, and to output a grid of components on a single image. The multipage output works for preparing print files, and the grid output works for preparing image files for virtual tabletops. The reason I don’t use data merge is because we’re simultaneously running physical blind playtests of Psykids while still maintaining the digital prototype, so I need both types of output, and there’s no easy way to do this.
If you’re only performing digital playtests or preparing your final files for printing, however, data merge can be useful.